Posted on Leave a comment

Floral scented handmade Soy Candles

New Product Alert! 🚨 ‘An English Garden’ 💐 Handmade Soy Candles

At last, after many months of development. I have finally launched the most beautifully scented soy candles you are gonna have a whiff of this year. Inspired by ‘The English Garden’ theme for my pop-up event in Studio Nine on Totnes high-street. These vegan soy candles are a Collection of floral and fruity goodness each in an individual handmade, wheel-thrown and piped pot.

Firstly, I threw these adorable little vase vessels on the potter’s wheel with hand-piped decoration adorning each one. Then, they are glazed in a lovely, smooth, satin white glaze and an array of colourful oh-so-glossy glazes. Before they are each hand-poured with high-quality fragranced soy candle wax. Also each handmade candle is protected with a handmade (from recycled paper) dust cover.

ceramic handmade Soy candles fresh fruity and floral fragrances in shop on table
Introduction of Soy candles at Studio Nine Pop Up Event | June 2022
Style 1 – Piped Spots
Style 2 – Piped Ribbon

Finally, once you have melted your candle to the bottom, just remove the remaining candle wick and wipe the inside with some kitchen roll or tissue. Then you have a stunning mini vase for tiny bouquets or maybe a pen pot for the office.

Priced at an Exclusive introductory price of only £22.

The 10 Scents:

Rhubarb & Blackberry

A delicious fruity blend, this is perfect for those with a sweet tooth but who also want a bit of sharpness. Rhubarb and blackberry with a hint of vanilla. This smells like the world’s best crumble.

delicious pie with rhubarb
bowl of blackberries

top notes: fruity, rhubarb, apple, red berries

heart notes: rhubarb, strawberry

base notes: sweet, creamy, vanilla, custard

Plum, Rose & Patchouli

This one is beautifully fruit, floral and a little bit earthy. It also has a little bit of sweetness from the tonka bean, plum and vanilla; and citrus from the orange and bergamot.

high angle view of fruit bowl of plums on table
selective focus photography of pink rose flowers

Top Notes: Plum, Cassis, Rose, Bergamot, Orange

Heart Notes: Black Cherry, Prune, Cinnamon, Clove, Nutmeg

Base Notes: Patchouli, Vanilla, Tonka Bean, sweet, Musk

Sweet Pea

This beautiful strictly floral scent, if you’re not familiar, with this gardener’s favourite is similar to orange blossom and hyacinth, with a hint of rose.

blooming sweet pea bouquet in vase with water

Top Notes: sweet pea, rose, hyacinth, jasmine

Base Notes: woods and vanilla

Pear & Freesia

If I had to have a favourite (but lets be honest – they all are my fave!), it would be this one. Sweet, citrus, woody, floral – this fragranced soya candle has it all and perfectly balanced to radiate throughout your home. You’re welcome.

close up photo of bunch of pears
freesia flowers in a vase

Top Notes: bergamot, lemon and pear

Heart Notes: magnolia, orchid, rose, Muguet

Base Notes: musk, amber, patchouli

Peony & Suede

A charming scent of  exquisite peonies in voluptuous bloom. Flirtatious and seductive, with the juicy bite of red apple and the opulence of jasmine, rose, and carnation. All mingling to become sensually soft like blush suede.

close up of pink peony flowers

Top notes: peony, red apple, aqueous

Heart notes: rose, jasmine, carnation

Base notes: violet, plum, musks, patchouli, dry amber

Vanilla

The classic! Sweet Vanilla but with notes of nutty spicy nutmeg; hints of florals and hint of woodsy musk.

vanilla bottle for baking

Top notes: Madagascan vanilla pod, nutmeg

Heart Notes: florals

Base Notes: nuts, woods, musk

Raspberry & Peppercorn

This handmade soya candle holds the sharp and spicy scent of peppercorn; and the sweet and tartness of raspberries makes this lovely combination for this fragrance. Both woodsy, sweet and floral this is a great choice for the home.

healthy red fruits raspberries sweet
small heap of pepper on white surface

Top Notes: Raspberry, Black Pepper, Pink Pepper, Rose

Heart Notes: Whiteflowers, Jasmine, Vetivert

Base Notes: Musk, Amber

Blackberry & Bay

Both fruity and musky from the blackberry and herbal notes from the bay similar in scent to oregano or thyme. Also come in the beautiful floral notes from rose, geranium and muguet. This is a lovely strong but balanced fragrance.

bowl of blackberries
lush bay leaves of evergreen laurus nobilis tree growing in garden

Top notes: blackberry leaves and blackcurrant buds

Heart notes: rose, geranium, muguet and bay

Base notes: musk, sandalwood

Sea Salt & Driftwood

Something a bit different here and a definite favourite for myself and many others. A floral marine scent from refreshing notes of seaweed and green algae livened by a fresh coastal breeze and enhanced by touches of cyclamen and water lily. At the base of the fragrance, sparkling salt crusted driftwood is warmed by amber, patchouli and musk.

photo of seashells on driftwood
macro photography of crystal salt

Top Notes: Ozone, Seaweed

Heart Notes: Cyclamen, Waterlily

Base Notes: Driftwood, Amber, Patchouli, Musk

Lavender, Chamomile & Vanilla

This handmade soya candle holds a sensual and calming blend of french lavender, chamomile and lavender. This scent is great to burn for a calming setting, with floral notes of lavender, lilac, chamomile; fruity from coconut and peach and woodsy scent from cedarwood.

purple petal flowers lavender focus photograph
closeup photo of white daisy chamomile flowers
vanilla bottle baking

top notes: coconut, peach

heart notes: lavender, lilac, chamomile

base notes: cedarwood, vanilla

Remember to follow safety instructions labelled on the bottom of each one of the handmade soy candles.

By Christina Goodall

www.christinagoodallceramics.com

Find out more

Follow me on Instagram at Christina Goodall Ceramics and Margo Margo Jewellery to see the process of making my ceramics.

Also Christina’s handmade stoneware pottery made on the potters wheel is available to browse on this site. Read here for more information on how Christina Goodall Ceramics pottery is made.

Christina makes all her ceramics in small batches from her studio in Torquay, Devon. Unlike mass-produced ceramics, Christina’s handmade pottery is unique in its design and production.  She has a degree in Fine Art Sculpture from UAL which led her into ceramics. Christina then moved back to her hometown and began her business by assisting in pottery studios, teaching pottery workshops and producing her own ceramics.

Posted on 2 Comments

55 Things I learnt in the first year of my small Creative business

Here are 55 things I experienced during the first year of my creative business. Some I’m still regularly feeling.

1. It takes a lot longer than you thought

2. It will be a lot harder than you thought. You will think about giving up on several occasions

3. It will be a lot more frustrating than you thought. You will want to pull your hair out on several occasions

4. But it will also be a lot more satisfying than you ever thought

5. Every hour you are awake you will be thinking about your business in some way. It will probably keep you up at night too

6. You will be on your phone nearly as much as you will be at your desk working

7. You will spend hours and hours soaking up all that business advice from blogs and podcasts

8. Pricing your products is hard. “time spent making these+materials+etsy 5%+free delivery+packaging+electric+100% profit=?????”

9. You also know your product is valuable but you desperately want those sales so you underprice them

10. You will have to learn so much about branding, social media marketing, photography, photo editing, consumer rights, book-keeping, cookies, website design, blogging, SEO. The list goes on and on

11. Instagram is way harder than you thought, posting an interesting photo each day suddenly seems impossible

12. You have to spend money to make money. Unfortunately

13. So your other job (that is probably paying minimal wage) will keep you financially afloat. Just

14. That first sale (that isn’t from someone you’re related to) will feel soooo good

15. Adulting and running a business in general is hard. You’re tired constantly

16. You don’t have a weekend anymore

17. Early mornings become your norm now

18. But also entire days in your pyjamas with your laptop are acceptable too

19. Although Netflix is your new best friend so it’s kind of okay

20. Finishing a blog post twice a month is a lot harder than you first thought

21. But apparently blogging is essential to get traffic to your website so you continue to try (and fail)

22. Everything will feel overwhelming sometimes

23. So it’s good to ask for help

24. And then you read a business book for dummies and everything suddenly seems so simple

25. Sometimes you surprise yourself at how good you are at your job

26. Then the self doubt sets it

27. But then someone comments how much they like you’re new product on Instagram and you’re fine again

28. You get embarrassed when your new favourite product doesn’t get many likes on insta

29. But when one of your favourite accounts likes one of your photos you’re over the moon. You must be doing something right!

30. You will no longer have a social life. “I can’t go out tonight, I’m working”

31. Social media is not a social life

32. Treating yourself is a good idea

33. Because Self-care is important

34. Life puts barriers in our way. Including the whole of 2020

35. Christmas is your key selling opportunity

36. You thought you were busy before. You learn the true definition of ‘busy’ now

37. And you don’t sell all your Christmas stock so you just give it as gifts to your family instead

38. But then January comes and you have to get your books finished

39. Creating a website is way more complicated then you thought and way more expensive

40. Hardly anyone will be looking at your website for a long time how ever much you write about it on your facebook business page

41. You realise Google is all-powerful. You do everything you can think of to please it. Bow down to it’s omnipotence

42. Oh and once you put your phone number out there on the world wide web you will start getting constant scam calls asking if you’ve been in a car accident

43. You resent buying supplies on amazon (making Jeff Bezos even richer) but also they have so much choice you can’t resist

44. Procrastinating on Pinterest making boards of your dream bedroom decor or the perfect vegan brownie recipe is not working

45. But spending hours procrastinating on Pinterest looking at other maker’s work is kind of working, right?

46. Multitasking is key. You will have many fingers in many pies

47. Great Customer service is also key

48. Packing an order really well and writing “please please please be careful with this” on the parcel in bold capital letters still doesn’t mean the parcel will end up in one piece to your customer

49. Getting your product to the top of your niche Etsy search will feel good

50. Waiting for someone to buy it won’t

51. When it does sell, you will probably do a little happy dance

52. When you get that first 5 star review you just want to bow down and kiss their feet

53. But even after you send your lovely handmade product off swiftly and beautifully packaged, getting a ‘meh’ 3 star review will feel awfully personal

54. If you’re £3.28 in profit at the end of the month you’re overjoyed. At least you paid your bills. Who cares about paying yourself a wage?

55. Basically starting a business is way harder than you ever thought but also so rewarding at the same time. It’s basically the best thing you’ve ever done

Thank you so much for getting this far!

How many of these do you relate to as a small business??? Let me know and we can laugh/cry together.

Many thanks for reading!

By Christina Goodall

www.christinagoodallceramics.com

www.facebook.com/christinagoodallceramics

www.instagram.com/christinagoodallceramics

Posted on Leave a comment

NEW: Margo Margo Ceramic Jewellery

So I might be a bit crazy. I’ve just gone and started my own Porcelain jewellery collection called Margo Margo Jewellery.

How they are made

The project started in 2020, the year of isolation, when I realised I needed to try and work from home as much as possible instead of my pottery studio. I decided to start experimenting and making something I had wanted to try for a long while – porcelain earring pendants.

raw white Porcelain clay with cut outs of earring shapes part of the Margo Margo Jewellery collection.

Porcelain Slab cut out

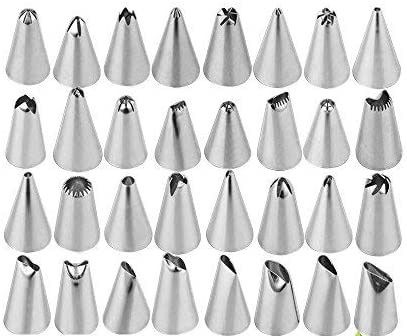
Much like in baking (there always seems to be similarities between baking and ceramics!) I rolled out my porcelain clay thin like pastry and started cutting out the shapes with some cookie-cutter-like polymer clay cutters I found on Etsy and Instagram.

After bisque firing, I started a 3-day sanding job until each side was a smooth buttery finish (I had also sanded the first layer of skin off my fingers which was not pleasant). Then all the porcelain parts dried out and were fired in a glaze firing. They came out smooth and matte white.

White porcelain earrings shapes to be fired in kilnReady to be Glaze fired

Margo means Pearls!

I wanted to incorporate pearls (the name Margo means pearl hence the name), mother of pearl shell and glass miyuki beads within the design with a colour palette of mostly white, cream, green and pink in mind. Then, I began assembling the earrings at home with help of sketches I had drawn of some designs I liked. I watched lots of youtube videos on how to make jewellery: opening jump rings; attaching earring posts; peyote beading stitch among other jewellery making related subjects.

How to learn more

I started a new instagram account named Margo Margo Jewellery as the collection might have looked out of place on the Christina Goodall Ceramics account. I started reposting seaside inspired images from other accounts and photos of the Margo Margo earrings against glossy satin fabric that beautifully contrasted against the white matte porcelain.

Each earring design is named after a feminine name with a meaning that relates or sums up the earring design. Some come is more than one colour wave depending on the design.

Some of the earrings hang on a french style earring wire while the majority are attached to a hypoallergenic stainless steel earring post with backs coated in clear resin stopping the post from ever snapping off.

I have loved making these new little objects. I made them with idea of there being a style for everyone. Currently there are over 50 designs, from statement dangle pearl earrings to impress your work mates over zoom to minimalistic understated studs for the everyday.

All the earring designs are available on Etsy at www.etsy.com/uk/shop/MargoMargoJewellery.

Many thanks for reading!

By Christina Goodall

www.christinagoodallceramics.com

www.facebook.com/christinagoodallceramics

www.instagram.com/christinagoodallceramics

Posted on Leave a comment

Making Ceramic Gingerbread Ornaments

close up photography of gingerbread

Christmas is still more than 3 months away and yet I have been making ornaments for the holiday all of this month; here is a little video of me making ceramic gingerbread people ornaments from start to finish. These guys will be a special release on my website shop for Christmas 2020 in the coming weeks.

If you have an interest in making with clay, this might be a lovely project just in time for Christmas. Or if you would just like to see how I make these hanging ornaments. You can even make a more accessible version using salt clay or air dry clay using the same techniques here.

What you will need:

  • Clay (I used buff slightly speckled stoneware here. Terracotta would be an ideal clay for this project also)
  • Gingerbread people cutter
  • Rolling pin
  • Rolling guides
  • Potter’s knife
  • Potter’s rib
  • Piping set with piping bags and assorted nozzles
  • Drill Bit
  • Underglaze in white and light brown (I use a brand called Contem)
  • Small Paint brush
  • Transparent Glaze
  • Gold Ribbon

Instructions

Step 1: Roll out your clay using Rolling guides and a rolling pin. Roll out to about 0.5cm. Compress your clay with a potter’s metal or hard rubber kidney. This will will reduce warping and any air bubbles.

Step 2: Preferably allow to dry to a bit softer then leather hard. Begin cutting out your Gingerbread people with cutter.

Step 3: At leather hard, draw out your design. Drill a small hole near the top of your design with a drill bit about 3mm width. Fill your piping bag with thick clay slip and choose you nozzle. Pipe your clay slip with a similar pressure you would use for frosting on a cake (takes a bit of practice to get used to the consistency and method). I use a small round nozzle to pipe the face and wiggle lines on the arms and feet; and I use a french star shape for the body buttons. Allow to dry slowly to bone dry for first firing.

Step 4: Fire in bisque firing when completely bone dry. Remove from kiln. Wash with water to remove any clay dust. Allow to dry.

Step 5: Pick out your underglaze colours. Remember underglaze does not fire to the same colour it looks unfired so you may require test tiles to compare. Begin to Paint your Gingerbread Ornaments with underglaze (I water down my underglazes about 1:1 to water and apply about 3 layers). I used Contem Light brown and white. Allow to dry.

Step 6: Paint wax on the back of your design including the thin sides. Allow to dry. Prepare your transparent glaze. I use a piece of wire to hook the ornament threw the drilled hole and dunk into the glaze evenly coating your ceramic ornament. Allow to dry. Wipe the back clean of any drips of glaze.

Step 7: Your Gingerbread person is ready for glaze firing. I fire to cone 6. When your kiln is cool enough, retrieve your ornament and tire twine/string threw drilled hole ready to hang on your Christmas tree.

Many thanks for reading!

By Christina Goodall

www.christinagoodallceramics.com

www.facebook.com/christinagoodallceramics

www.instagram.com/christinagoodallceramics

Posted on Leave a comment

13 Common Potter Mistakes

If you know, you know. That is if you are a potter, you understand my woes. This is 13 Common Potter Mistakes that we have all at some point made in our making process. Clay is a delicate fellow who definitely lets you know when it’s not happy.

1. Wedging air into the clay so that when you are throwing on the wheel you find a nice big air bubble and have to grab for that needle tool

2. You then poke/stab yourself with that needle tool. Ouch!

3. You throw a lovely, elegant-shaped pot. You cut it off the wheel and transfer it to a batt to dry and then you accidentally lose your balance and in slow motion drop it. You sigh. There it is. Your lovely pot squished flat like a pancake on the floor.

4. While working on your leather-hard pot, you accidentally scratch the lovely smooth surface with your finger-nail. Forcing you to have short nails for life

5. Trimming a pot. You begin to carve a nice foot ring on the bottom. You feel a bit more generous and start to push a bit further down- urgh you’ve just carved a hole instead

6. Usually you’re pretty skilled at not breaking your wares, but some days you develop butter fingers and break more than you make

7. You score and slip like a pro when attaching your handles but still somehow after a bisque your mug handle is slightly cracked around the seam

8. You wax your pot’s bottom/foot ring and somehow drip wax down one side. That stuff is bloody hard to remove! Where did I put that lighter to try and melt it off . . .

9. The excitement is overflowing to open the glaze kiln, and after waiting a whole day to let the kiln cool down enough. You open the kiln to find . . . your pot is completely stuck to a kiln shelf. Your lovely new glaze has melted and slid down the pot attaching itself there

10. You threw a lovely jar that fits perfectly together with it’s lid. After carefully glazing the two parts, where they slot together is clean of powdery glaze. But when you open the glaze kiln to find that it’s lid has somehow fused with the pot and you cannot release them however much you try

11. That mysterious hairline crack that comes out to say hello in the glaze firing. It must have been so small you didn’t notice it when you glazed over it but when coming out of the glaze firing, it has become a big ole crack

12. My personal favourite. PINHOLES. These crafty little buggers come out randomly even after you do everything in your power and cover every variable

13. Pottery has a memory you know. It remembers all your little mistakes. Grab your pottery a bit harshly and the clay will punish you later for it by warping

Thank you so much for getting this far!

How many of these do you relate to as a potter??? Let me know any that I have forgotten and i’ll make sure to include them.

Many thanks for reading!

By Christina Goodall

www.christinagoodallceramics.com

www.facebook.com/christinagoodallceramics

www.instagram.com/christinagoodallceramics

Posted on Leave a comment

My 6 Go-to Pottery Throwing Tools

Here are 6 tools I can’t go without when sitting down to throw (as well as my pottery wheel of course!) I’ll let you in on my tried and true favourites. All of these products are available online if you think they might help you throwing those clay shapes.

1. Ribs – These ones aren’t made out of bone but instead wood, metal and plastic. My favourites are the mud tools ribs that come in a variety of shapes and colour-coded flexibilities. I use the The ‘Very soft’ Red Shape 1, The ‘Soft Flex’ Yellow Shape 2 and The ‘Medium Flex’ Green Shape 4.

The Red one is great for the initial pulling and shaping, this super flexible rib is easier to work with the soft clay.

The Yellow one is more rigid, I find this better for cleaning up the shape of the thrown shape and removing all that clay slip. That sharp right angle lets you clean up the base as well.

I find the Green one is better to use when trimming, the harder polymer can actually scape the clay and act as a trimming tool to clean up and smooth the surface. I even use it as a burnishing tool on leather hard clay. Buy directly from Mudtools or most clay suppliers including Bath Potters and Scarva.

Red Mudtools throwing rib

MUDTOOLS Shape 1 Rib

I’ve also used wooden ribs which depending on the type of wood, can swell and degrade. I find the best way to avoid this is to steer clear of ribs made of ‘Boxwood’ and instead go for a hardwood or bamboo.

There are also ribs that can create some fun textures and shapes. I use a bamboo throwing rib from Bathpotters that gives a neat and clean bee hive shape.

bamboo pottery rib

Bamboo Throwing Rib

Also you can use Cake decorating cake scrapers, used to scrape icing away from the surface of a cake to create patterns. I bought a set from amazon and the result can be very good. They are almost awkwardly too tall but the variety in one set is fun to play around with.

2. Diddler – A strange name for a sponge on the end of a stick but there you go. Diddlers are helpful because they allow you to remove water from a vessel when the vessel is too narrow to remove it by hand with an ordinary sponge. They also allow you to remove some of the clay slip from the internal wall. Yes they are a simple design, but sometimes the best tools are. Here is the one I use.

3. Callipers

These are great when your’e creating lidded vessels like jars and teapots to accurately measure the lid to fit the rim or internal gallery. There is no need to remember measurements like would need to do with a ruler as the measurement can be screwed tight in place. Also if you’re aiming to throw multiples and you want them to be a specific width or height, go ahead and use callipers. There are several types available online at varying price points.

4. Needle tool

MUDTOOLS Needle Tool

5. Mirror

Any mirror will do! Put a mirror up in front of you when throwing. Angle it so that you can see your hands on the wheel, so that when throwing you have vision of the side of your pot as well as your bird’s eye view from above. This way you don’t have to move your body too much when throwing to look at the side while pulling and shaping. You can just look to your mirror.

6. Hand cream

It’s easy to dry out your hands when throwing as a potter. The constant rinsing of hands, as well the silica and grog in clay is lightly abrasive. Glazes as well can act as an irritant on the skin, due to the dust, acids and alkalis that can be present. This can lead to ‘work-related dermatitis’ which causes painfully sore skin (so try to wear latex gloves when glazing). I use hand cream before I start working, as needed during the day and then at the end of the day. O’Keef’s Working Hands Hand Cream is my preferred choice at the moment. I find it moisturises my skin well, soaks in quickly and doesn’t feel oily.

Many thanks for reading!

By Christina Goodall

www.christinagoodallceramics.com

www.facebook.com/christinagoodallceramics

www.instagram.com/christinagoodallceramics

Posted on Leave a comment

‘Maker’s Block’ Remedies

You’ve probably heard of ‘writer’s block’ but believe me when I say there is also such a thing as ‘maker’s block’. If you’re a crafter or an artist, you have probably already experienced it. When you sit down to make something and feel completely uninspired or your mind feels blocked of creativity and new ideas. Here I give some remedies to said block. This is the ‘How to get your creative Mojo back!’ list of things to try.

1. Self care

Take time to heal mentally and physically. Slap on a face mask and rest that aching back (from hunching over your latest project for hours) with a hot bath and a glass of wine. Stay in bed for a few extra hours to catch up on your z’s and Rupaul’s dragrace or chill with a good book by the crackling fire. Whatever it is that makes you feel a bit more recharged.

2. Try a different creative output

Sometimes putting pressure on yourself to make money from a craft can zap your creativity. But having a go at a creative medium you haven’t tried or long forgotten with no pressure to be good at can relieve stress and get the creative juices pumping again. Embrace the experimentation and the mistakes.

3. Mental health check

Just take a minute to stop making and have a little check-in with your own mental health. You might not have even realised you were struggling a little bit while you were rushed off your feet. If you think you need a little help speak to a friend, family member or your doctor.

4. Talk to a friend

Ring a friend and talk until you’ve both put the world to right! Review a recent Netflix show you both loved, chat world events, moan about your other halves to each other and maybe release a bit of gossip you’ve been dying to drop. Having a catch up with your friends is going to release some of that stress you’ve been carrying around and then allow you to let loose the creativity.

5. Pet a cute furry Animal

Did you know it’s a proven fact that petting a dog or cat can lower resting heart rate and increase some of the happy hormones serotonin and dopamine. Furry friends are good for our health and basically make life more bearable. Another form of relaxation to get you ready to start making again. And if you don’t have a pet at home to cuddle, maybe search ‘cute baby animals’ on youtube as a compromise?

6. Have a walk in Nature

Maybe take said pet on a walk with you in nature? Or you could try camping (or glamping?)! Take a moment to breathe in all that fresh air; hopefully it will recharge the creative mojo in your mind and it might even inspire a new creative project.

Many thanks for reading!

By Christina Goodall

www.christinagoodallceramics.com

www.facebook.com/christinagoodallceramics

www.instagram.com/christinagoodallceramics

Posted on Leave a comment

My 10 Go-to Glazing Tools

Christina Goodall Pottery blog glazing post

Glazing might be my least favourite part of making pottery (okay, I actually hate it) and I often heard other potters say the same thing. Glazing can certainly be frustrating to say the least. You make this lovely clay vessel/object and then you fire it once, it survives and looks great so far but then you go and coat it in a glaze you think you know pretty well. Then comes that fateful day when you open the kiln and that glaze has dripped all over the kiln shelf; or cracked; or shivered or pin-holed or whatever. You internally scream because you spent hours on this and it has come out wrong. It’s so frustrating.

But I’ve come to know a few ways to minimise these frustrations. These are my 10 Go-to Glazing tools to help you out.

Glazing tongs

These are my go-to tools as I dip most of my ceramics. I have two different types, both are more suited to glazing certain shaped vessels.

www.claymansupplies.co.uk/Products/Miscellaneous_Tools/6393Sponge

www.scarva.com/en/Scarva-Tools-Glazing-Tongs—Soft-Plastic-Grip-Handle/m-1075.aspx

Essential all-rounder for any pottery! Its all about quantity not quality with this one. I have so many cheap sponges in the studio because they are useful for every stage of making pottery. In glazing, I use them to clean up any spillage and also to wipe pottery bottoms (a MUST! even if they have been waxed) as you don’t want your lovely pot to be to come out of the kiln

Studio safety is essential! Dust inhalation is no joke! So a Respirator is a good investment in every pottery studio. During glazing, glaze dries quickly on bisque work and can cause dust in the air and spilled glaze should be wiped up while still wet to deter glaze dust in the studio. Glazes are made of glass and clay dust as well as metal

Wax and Latex

Essential if you want more control on how much of the foot ring is left unglazed. This might be extra important if you have a glaze that drops (and you want to save your kiln shelves!) Use wax or latex as a resist to resist your glaze and keep your foot ring clean. I find wax is better at resisting glaze but is near on impossible to remove from the surface if you apply a bit of a wonky line or accidental drip. Latex if applied too thin can tare or ripple to allow glaze through, this easy to fix with a damp sponge by just wiping clean. Also you can easily remove by peeling off.

www.scarva.com/en/Scarva-Raw-Materials-Wax-Emulsion–Resist/m-148.aspx

www.scarva.com/en/Scarva-Special-Effects-Liquid-Latex-Emulsion/m-3055.aspx

Ladle

New favourite tool! Really helpful to cover vessels that are too tall to dip glaze. To glaze the outside, I hold the vessel with my Glazing tongs upside down, ladle the freshly whisked up glaze over the ceramic back into the bucket.

www.ikea.com/gb/en/p/fullaendad-soup-ladle-grey-80393089/

Funnel

Very useful for glazing the inside of vessels. Especially pots with a small neck or rim. Just place and ladle in your whisked glaze into the funnel. I fill about half the vessel, then while holding my pot slowly pouring the glaze out whilst also turning the vessel. This covers the the entire inside of your pot.

www.ikea.com/gb/en/p/chosigt-funnel-set-of-2-assorted-colours-70153179/

Slip trailers

These are great if you want to experiment with layering your glazes. I also use them to glaze any missed spots of fiddly pottery that can be sometimes hard to glaze like teapots.

www.bathpotters.co.uk/slip-trailer-medium-100cc

Metal kidney

A cheap and very useful tool that every potter probably already has; this can also be used at the glazing stage of your pottery making. When dipping your pottery in glaze, it may have caused runs on your pot. Allow the glaze to fully dry and become powdery. Then take your metal kidney tool and lightly scrape the raised glaze run until it is even to the rest of the surface. Then gently smooth out with your finger.

www.bathpotters.co.uk/extra-flexible-steel-clay-scraper-medium

Glaze stirrer

A easy and cheap option to stir up your glaze to disturb the heavier materials from the bottom. Mixing up all the ingredients so that all the ingredients (of different weights) are evenly dispersed throughout the glaze is very important so that you don’t use up lighter (weight) materials on the top and leave all the heavier materials at the bottom.

The only thing is, if you use glazes that sit heavier at the bottom you might want to instead go for a more industrial option of a drill and paint stirrer.

www.bathpotters.co.uk/black-plastic-glaze-stirrer

Drill and paint mixer

A more expensive tool but well worth it. This will thoroughly stir any glaze with ease in seconds. An investment would be to buy a good quality drill and then a cheap paint stirrer/paddle from any DIY store. My main piece of advice? Do not let your drill overheat.

Epsom Salts

Also known as magnesium sulfate. Can be used as an easily accessible and cheap flocculant.

The flocculent thickens the glaze, by charging particles so that they gel together and attract to each other. This helps all the components in the suspend in the water more easily. It also helps the glaze drip less easily and stay put on your bisque wares.

Use approximately 30g dissolved in 100ml of warm water.

Respirator

Studio safety is essential! Dust inhalation is no joke! So a Respirator is a good investment in every pottery studio. During glazing, glaze dries quickly on bisque work and can cause dust in the air and spilled glaze should be wiped up while still wet to deter glaze dust in the studio. Glazes are made of glass and clay dust as well as metals that can be toxic if inhaled.

www.screwfix.com/p/gvs-elipse-half-mask-respirator-p3/6922g

Let me know what your favourite tools are when it comes to glazing and maybe we can all start to enjoy glazing – maybe!

Many thanks for reading!

By Christina Goodall

www.christinagoodallceramics.com

www.facebook.com/christinagoodallceramics

www.instagram.com/christinagoodallceramics

Posted on Leave a comment

The 8 Stages of Clay

diagram showing stages of hydration and dehydration of clay for potteyr newbies

This is the 8 stages of clay before it even goes near the kiln. These stages are based on water content and this in turn affects the consistency of the material. Each stage has own it’s uses and techniques available. Clay is so varied in what you can make, and this is hugely due to the many stages of clay.

Slip

This is the stage when the clay has it’s highest water content. At this stage you can prepare it to pour into moulds to slip cast your pottery. I also use slip to attach handles to mugs as a clay glue and any other attachments. Whisking (I use a paint mixer and drill) the slip clay can stop the heavier sediment from sitting at the bottom.

Soufflé clay

I’ve added this extra stage to the traditional stages of clay. This stage has less water than the last and as the name suggests, imagine a sloppy kind of consistency like clotted cream (can you tell i’m from Devon?). I pipe clay at this stage and it just about holds it’s shape and texture instead of pooling like slip would. This is also the stage I would begin recycling clay by whipping it up into a smooth consistency and place on plaster batts to dry out for recycling..

Soft clay

Again this is the next stage of drying. The clay is too soft to throw at this point but it can be used to make hand-built coiled pottery. Also I like using this clay to smooth out the seam of handles to create a seamless attachment. You can also begin wedging recycled clay from the stage previous now on a plaster batt ready for the next stage.

Out of the bag soft/Plastic

You can finally throw with this clay! Weigh it out and ball it up to begin throwing. You can also roughly model sculptures with this clay but don’t expect to get much sculpted detail. You’ll have to wait for the next stage or use a heat gun to dry it out quicker.

Soft Leather hard

This stage is great for carving clay and creating textured surfaces. Now is also the time you want to trim a foot on the bottom of your thrown pottery and stamp your logo. Soft Leather hard is when you create lips on the rims of pots and attach handles using slip. It’s all about that score and slip technique with handles!

Leather hard

This is the last stage that you can do anything to change the form of your pottery. You can still add handles and also cut holes for things like plant pots. You can also use a needle tool to sign your name on the bottom now instead of a stamp. And you may want to also burnish your piece now, a kind of polishing technique; with the back of a spoon or a smooth pebble to polish and kind of seal the surface of your clay. This is also when my stoneware clay is at it’s darkest in colour; and it is also cold to the feel because of the water present.

Half dry

Nearly dry but I can tell it is not quite because the clay is still cold to the touch. You should look out for handle seams having cracks at this point as you will want to decide which ones go in for recycling before they all go in the bisque. You should allow to completely dry out before bisque firing (to save your kiln elements).

Bone dry

Room temperature to the touch because there is no water content making it cold. Now is the most delicate stage of the clay. Which is unfortunate because so much effort has gone into it by now! I commonly use two different decorating techniques on this stage; the first is water etching to create a raised image on the surface of the clay and second is I often paint underglaze on at this stage which will develop in the bisque firing. You can now place bone dry work in the kiln for bisque firing. Bone dry is also the best stage to soak unused clay to recycle, the clay quickly breaks apart and disintegrates in the water. This then goes onto to become slip clay and so the cycle begins again!

Comment and let me know what you think!

Many thanks for reading!

By Christina Goodall

Visit my Website – www.christinagoodallceramics.com

Visit my Facebook – www.facebook.com/christinagoodallceramics

Follow me on Instagram – www.instagram.com/christinagoodallceramics

Browse my Porcelain Jewellery for sale – www.etsy.com/uk/shop/MargoMargoJewellery

Posted on Leave a comment

Pottery Pop-Up

My handmade pottery is on display in the pop-up window of Studio Nine in Totnes this week. A very exciting opportunity! From the 5th to the 10th April, I have the whole window to myself to display my handcrafted work, old and new, in all its colourful glory. So, if you’re a Totnes local – feel free to have a browse!

All the pottery shown is hand-thrown on the wheel by me from my studio in Torquay. And piped with wet clay using cake decorating techniques. The pottery is bisque fired, hand-painted with pottery stains and underglazes, waxed and readied for glazing. Finally, the ceramics are finished off by glazing in satin glazes, with a food safe clear glaze inside and glaze fired.

The work is displayed in 4 colour blocks – pink, peach, green and blue; as I thought this would look more cohesive. There is a mixture of products from candlesticks and candle holders, to Vases, to mugs and a teapot, to ring holders and jewellery jars.

The majority of the work is in my piped style; some with piped bows; frilly star shapes; climbing vines and leaves; shells and dots. Some pieces including mugs, vases and teapots have piped feet in the the style of claw feet (popular during the English Renaissance and forward) which raises them slightly.

Available work is (L to R): Green Heart Cut out Pillar Candle holder, Green piped basket, Piped Vines and leaves donut wall vase, (back) Green vase with piped rim, Green twisted handle piped feet mug, Green water fountain jewellery holder, (back) green tall footed dish with piped vines and leaves, green 3-piece piped incense oil burner, green piped tea-light holder, green piped top lidded jewellery jar, green vase with piped trellis vines and leaves,

(back) blue piped candlestick, blue twisted handle piped feet mug, blue piped ring holder, blue piped tea-light holder, blue piped tall footed dish, blue piped donut taper candle holder (holds 4), blue etched vase, (front) blue piped top lidded jewellery jar, blue berry bowl, blue piped vase with etched hearts and piped feet, blue piped rim vase, blue twisted handle piped feet mug

Available work is (L to R): pink tall vase with piped feet, pink twisted handle piped feet mug, pink piped top lidded jar, pink 3-piece piped incense oil burner, pink dumpy piped vase, pink tall vase/planter(with bulb plant), (back) pink piped vase, (front) pink piped donut wall vase, pink twisted handle piped feet mug, pink piped lidded frog vase, (back) pink vase with piped feet, (front) pink piped top lidded jewellery jar,

peach piped basket, peach piped bows and hearts pot, (back) peach vase with piped feet, (front) peach piped tea-light holder, peach twisted handle piped feet mug, peach piped ring holder, (back) peach piped frog vase, peach 3-piece piped incense oil burner, (front) peach piped dumpy teapot with twisted handle, (front) peach piped bow top lidded jewellery jar, peach piped incense plate, (back) peach piped rim vase

There have been some stunning displays of varying mediums and disciplines in this pop-up space. If you’re a local maker interested in displaying your work in Totnes, I would highly recommend following Studio Nine to see previous displays and details on future opportunities. It is a lovely space to showcase your wares from; and Lucie is lovely and very easy to work with!

If you’re interested in buying any of the pieces displayed please contact me here with details of which piece you would like to buy.

Comment and let me know what you think!

Many thanks for reading!

By Christina Goodall

Visit my Website – www.christinagoodallceramics.com

Visit my Facebook – www.facebook.com/christinagoodallceramics

Follow me on Instagram – www.instagram.com/christinagoodallceramics

Browse my Porcelain Jewellery for sale – www.etsy.com/uk/shop/MargoMargoJewellery